Create a weather based rule
To create a rule that is triggered by weather conditions for a project, follow these steps:
-
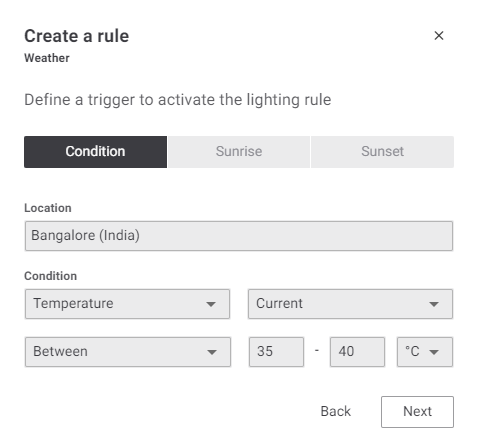
Click the Condition button to configure the trigger based on weather condition. Details regarding the trigger must be provided:
-
Location: Search for the name of the city. Custom Dashboard uses the local weather data for the selected city.
-
Condition: Select the condition from the drop-down list of supported conditions.
-
Rain
-
Snow
-
Visibility
-
Temperature
-
Rain volume
-
Snow volume
-
-
Condition state: Select the condition state from the drop-down list.
-
Current
-
Forecasted (24 hours)
-
-
Based on condition selection, extra fields may be visible and the user can select options from the drop-down list. For example, when temperature is selected, an option is provided to configure the value.
-
Greater than
-
Less than
-
Between
-
-
And based on the selected option, the appropriate value must be provided. For the Greater than and Less than option, only one value must be provided whereas for the Between option two valuesare required.
-
Click Next to go to the next configuration window. The option to schedule the rule or make it permanently active, is given.
 Create a rule - weather when scheduled
 -
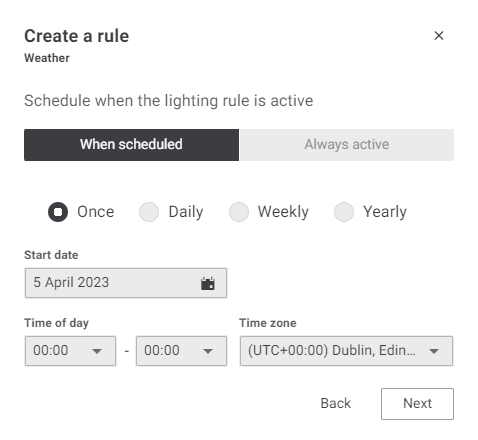
When scheduled, the user can chose for the following:
-
Once: define the exact date and time when the rule must be activated.
-
Daily: define date range when the rule must active.
-
Weekly: define date range and specific days when the rule must be active.
-
Yearly: define month and day when the rule must be active.
 Create a rule - weather always active
 -
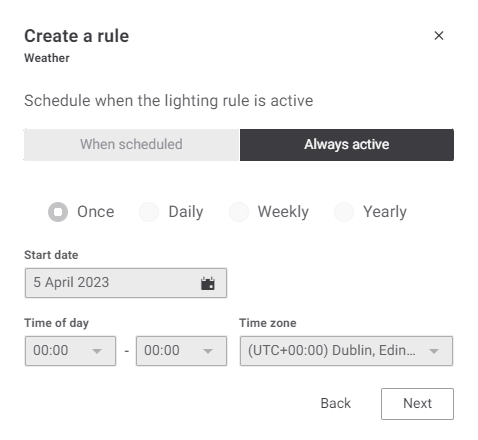
Always active: The light rule is always active, and all scheduler options are disabled.
-
-
Click Next to configure the action to be executed when rule gets active. A predefined set of actions is given to choose from.
 Create a rule - select an action
The predefined actions are:
-
Set light level - Interact Pro Enterprise (Interact Office):
-
Set light level - Interact City
-
Trigger scene or show - Interact Landmark
-
Trigger custom button - Interact Landmark
-
Set scene - Interact Sports [Recreational]
-
-
Select an action from the list. A window pops up to configure the action based on selection.
 Create a rule - set light level
To define the action for the lighting rule, provide required details:
-
Project: Select the project name from the drop-down list. The list is populated automatically from the Project view.
-
Area: Select the area from the drop-down list. The area list is populated automatically from the areas configured for the selected project.
-
Light level: Configure the light level for the action. The range is 0 – 100%.
-
Duration: Set duration in hours. After this duration, the light level will be reset. This means the next priority light level takes place.
-
-
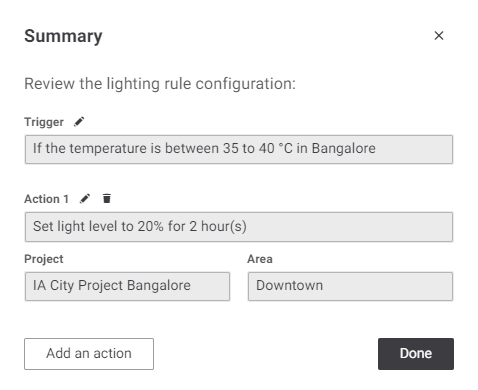
Click Next to add configured action to the rule. A summary window pops up. Review the trigger and action settings made.
 Create a rule - summary
 -
Multiple actions can be added for a rule. Click the Add an action button to add another action for the same rule. If multiple actions are added to a rule, all actions are executed when the rule is activated. Click the Done button to save the rule. Once the rule is saved, it appears in the Light Control Rules overview page.
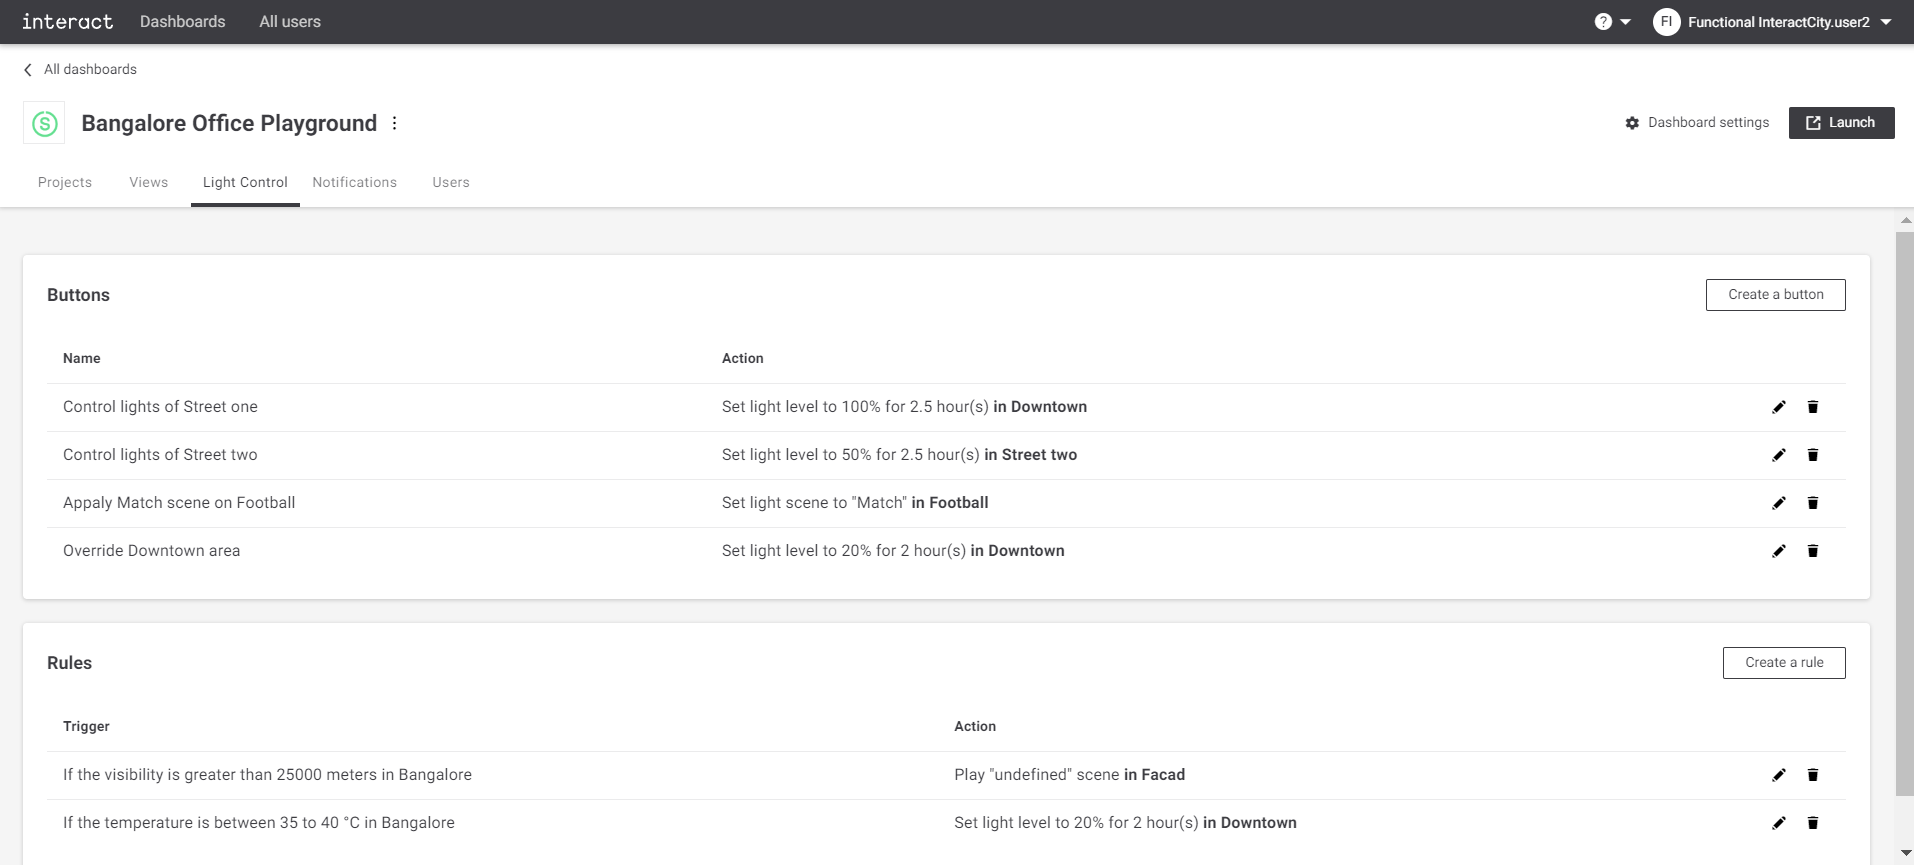 Configure playground Light Control
 -
Sunrise and sunset-based rules can also be configured.
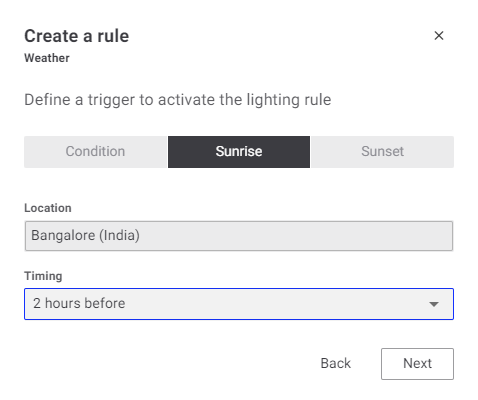 Create a rule - Sunrise
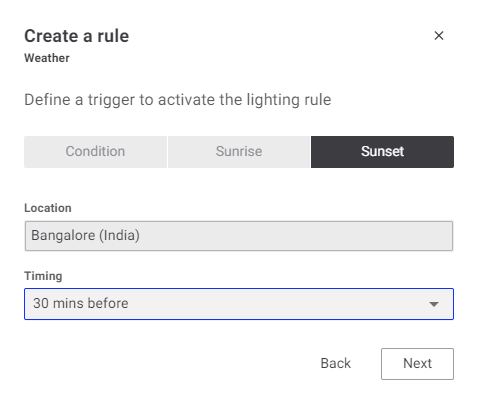 Create a rule - Sunset
The following items can be set:
-
Location: Select the city from the drop-down list. Search for a city name is available.
-
Timing: Select the timing at which rule must be active. The supported timings are:
-
2 hours before
-
1 hour before
-
30 minutes before
-
At sunset (for sunset), at sunrise (for sunrise)
-
30 minutes after
-
1 hour after
-
2 hours after
-
-
-
Click Next to go to the next configuration window. The option to configure becomes availble, when the rule is active.
Create a rule - weather when scheduled -
When scheduled, the user can chose for the following:
-
Once: define the exact date and time when the rule must be activated.
-
Daily: define date range when the rule must active.
-
Weekly: define date range and specific days when the rule must be active.
-
Yearly: define month and day when the rule must be active.
Create a rule - weather always active -
Always active: The light rule is always active, and all scheduler options are disabled.
-