Create a button
To create a button for a project, follow these steps:
-
Log in to Custom Dashboard and click the
 button on the appropriate project.
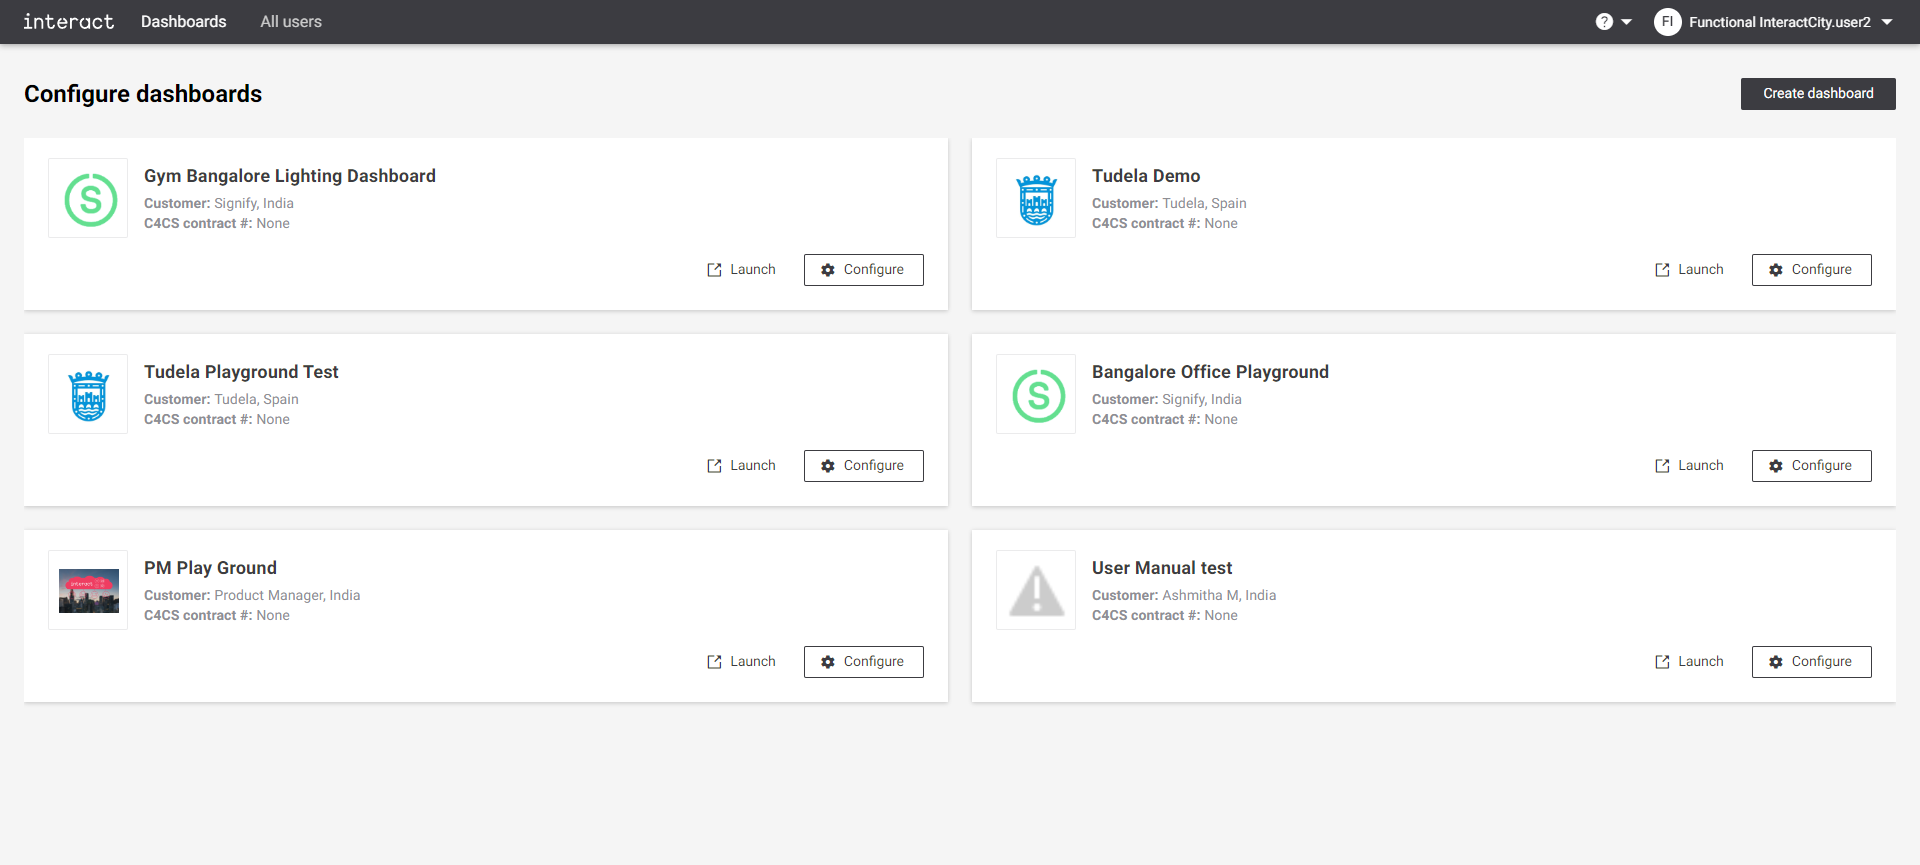 Configure dashboards
 -
Click the Light Control tab. It shows an overview of configured buttons and rules for the dashboard.
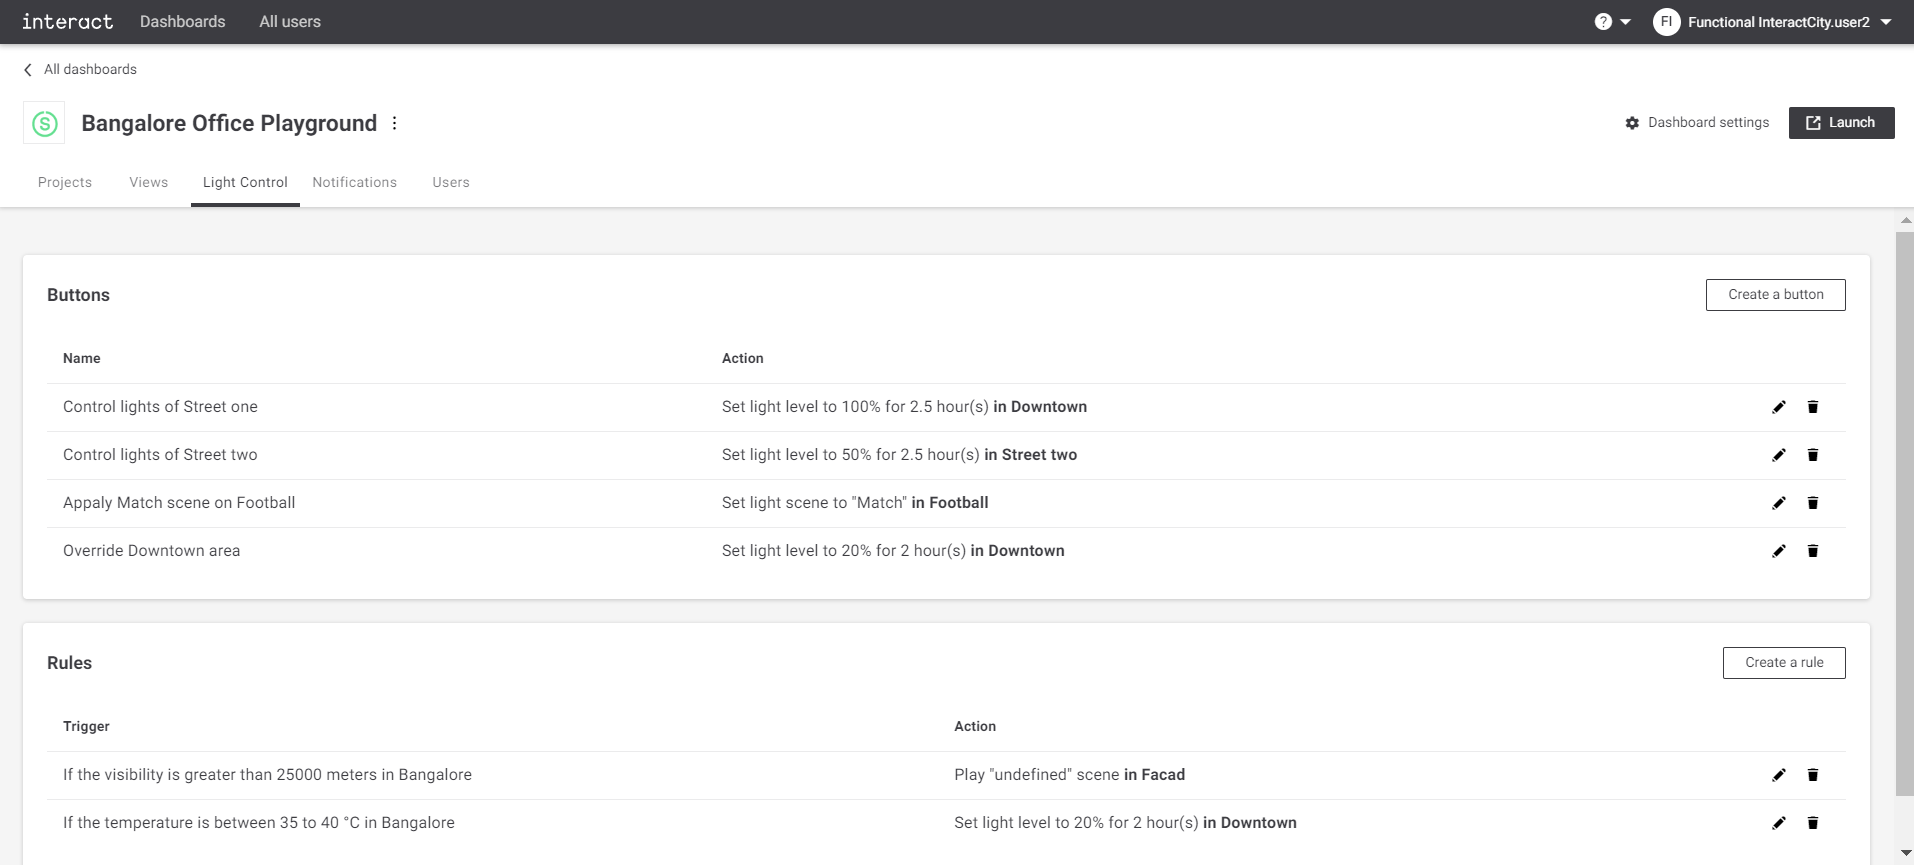 Configure playground Light Control
 -
Click the Create a button button to create a new button. A dialog appears with a predefined list of button actions.
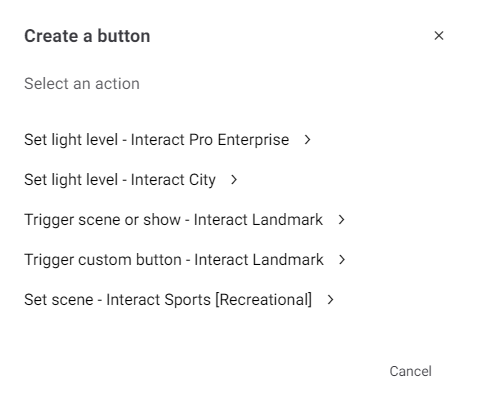 Create a button
 -
Select the appropriate action. Based on the selection of an action, a dialog appears with appropriate configurations required for that action.
For Set light level - Interact City, the following configuration is required:
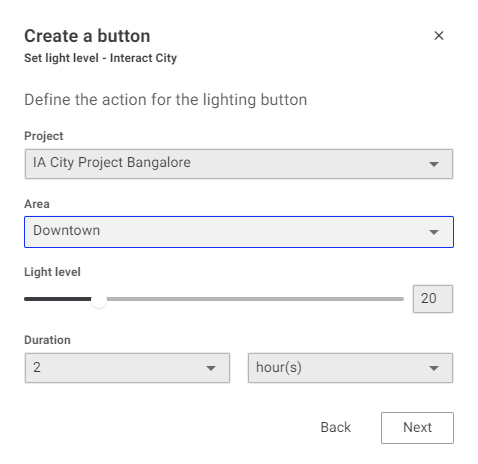 Create a button, set light level - Interact city
-
Project: Select the name of the project from the drop-down list. The list is populated automatically from the Project view.
-
Area: Select the area from the drop-down list. The area list is populated automatically from the areas configured for the selected project.
-
Light level: Configure the light level for the action. The range is 0% to 100%.
-
Duration: Set the duration in hours. After this duration, the light level is reset. This means the next priority light level is applied.
-
Click the Next button to provide the name for the button and view the action summary.
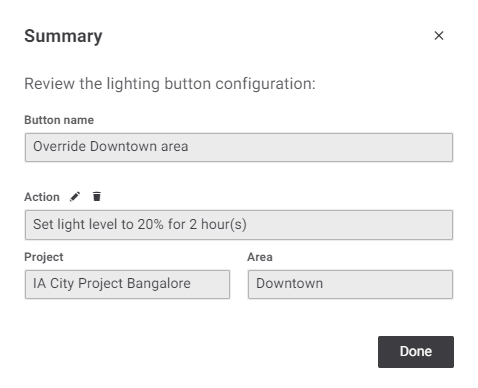
The action name is automatically generated based on the action defined in the previous step. A click on the edit button still gives the possibility to modify the action.
-
Click the Done button to add the button. The view details appear on the Light Control page. Click the
 button on top-right corner of the dialog to exit without saving at any time.